Setting up Sonoff Zigbee sensors/thermostats with ConBee III
Table of Contents
Backstory
A few months ago one of my Froy temperature sensors on my balcony died. It seems after a few years outside, the BME280 sensor has given up and begun to only report nonsense values. Since I never quite liked that the sensor was using WiFi to connect to my home network, I decided to finally give up on that and migrate to Zigbee for all future home sensors/devices. My main reason is battery life: In Froy, an expensive CR123A battery lasts at best 3 months. With Zigbee the same device sending the same data should ideally last for 1+ years. On cheap AA/AAA batteries.
I put off that project for quite some time now, mostly because I got sucked into a deep Factorio hole and because I was scared to tackling it: I once tried an RF example thingy and never got it to work. Debugging software is easy, debugging hardware is hard and debugging wireless communication is impossible for me. In that sense, Zigbee was intimidating. My original plan was to build everything myself, since random internet tutorials made is seem super easy to just buy a bunch of ESP32-C6 boards, flash a firmware and Bob’s your aunty. But with my experience from the RF experiments, I just didn’t want to get started.
Fast forward to two weeks ago and since my Factorio playthrough ended, I decided to finally start with this new project. But i decided to make it easy on myself and buy ready-made Zigbee devices first, get the network up and running and then later, maybe, build my own devices to just hook into the existing network.
That was a very, very good idea.
Products
I chose the following products for my setup:
- A ConBee III Zigbee coordinator. This is simply a USB stick that you can plug into any computer to make it act as a Zigbee coordinator. I chose this one because it is made by a German company and has good documentation and compatibility.
- A 4-pack of Sonoff SNZB-02B temperature sensors, mostly because I liked the form factor and came across these early in my internet search.
Both together come out at roughly 75€.
I will be using an Orange Pi as my hub device that will host the ConBee III stick. For setting up, I plugged the ConBee into my Windows PC, but once everything was working, I migrated the setup to a Docker-based app on my Orange Pi (with Armbian).
After the initial setup was completed, I bought a Sonoff TRVZB thermostat to control one of my radiators in my apartment.
Step-by-Step Guide
Setting up deCONZ
I will skip over the Windows setup and go straight to the Linux setup.
-
Plug the ConBee III stick into your Orange Pi. I heard that using a USB extension cord is recommended, so I did, but I cannot judge how much that really affects transmission performance.
Before you can access it, your user might need to be added to the
dialoutgroup to have permissions for accessing raw USB devices. If you cannot use/dev/ttyUSB0, check if you are part of that group and if not, add yourself and then logout/login. -
Install Docker and Docker Compose, usually from your OS’ package manager.
-
Setup a new Compose project and configure your one single container:
services: deconz: image: deconzcommunity/deconz container_name: deconz restart: always ports: # on my Pi, pi-hole uses port 80, so I'll expose DeCONZ on port 81 - 81:80 - 444:443 - 5900:5900 volumes: - ./data:/opt/deCONZ devices: - /dev/ttyUSB0 environment: - TZ=Europe/Oslo - DECONZ_WEB_PORT=80 - DECONZ_WS_PORT=443 - DEBUG_INFO=1 - DEBUG_APS=0 - DEBUG_ZCL=0 - DEBUG_ZDP=0 - DEBUG_OTA=0 - DEBUG_DDF=0 - DEBUG_DEV=0 - DEBUG_HTTP=0 - DECONZ_DEVICE=/dev/ttyUSB0 - DECONZ_VNC_MODE=1 # set this to 1 to enable VNC and 0 to disable VNC - DECONZ_VNC_PORT=5900 - DECONZ_VNC_PASSWORD=<passwordhere> # random keyboard mashing, for example 24uihjg52j4hgrz - DECONZ_UID=1000 - DECONZ_GID=1000 - DECONZ_START_VERBOSE=0 - DECONZ_BAUDRATE=115200 logging: driver: "json-file" options: max-size: "50m" -
Start your deCONZ:
docker compose up -d -
For the initial setup, you will most likely want to use the deCONZ software and not just the Phoscon web app. deCONZ offers much, much more information and access to all the Zigbee attributes, not just the few that Phoscon understands.
I downloaded a VNC Client (TightVNC in my case) and connected to the VNC port on my Orange Pi, using the password I configured in
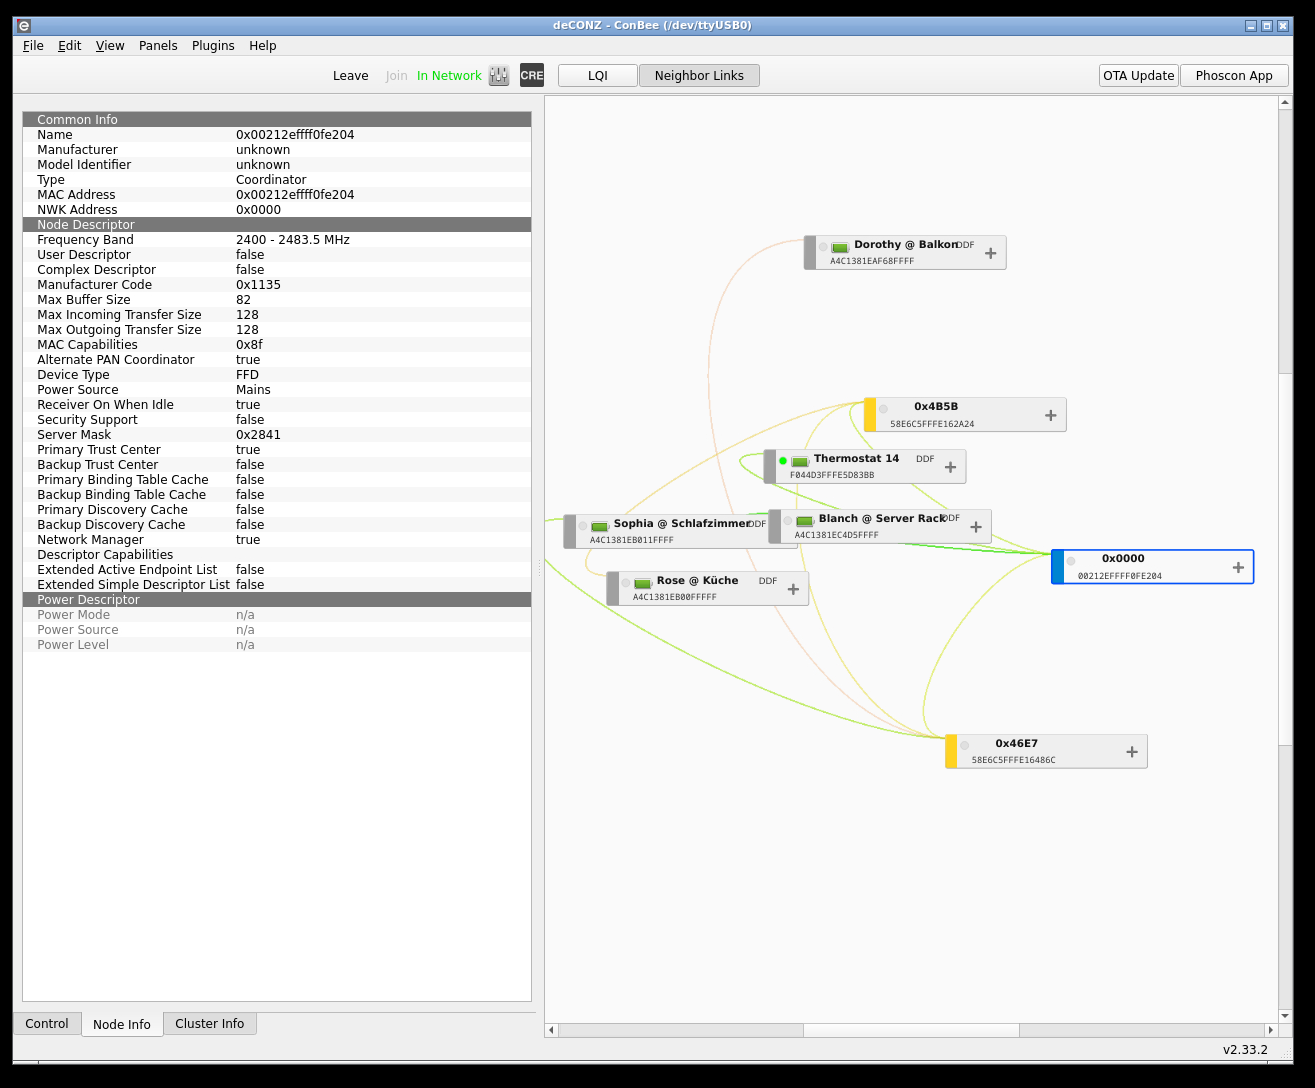
DECONZ_VNC_PASSWORD.When you connected, you should be able to see the deCONZ UI and also your ConBee III coordinator in blue.
Configuring Sonoff sensors
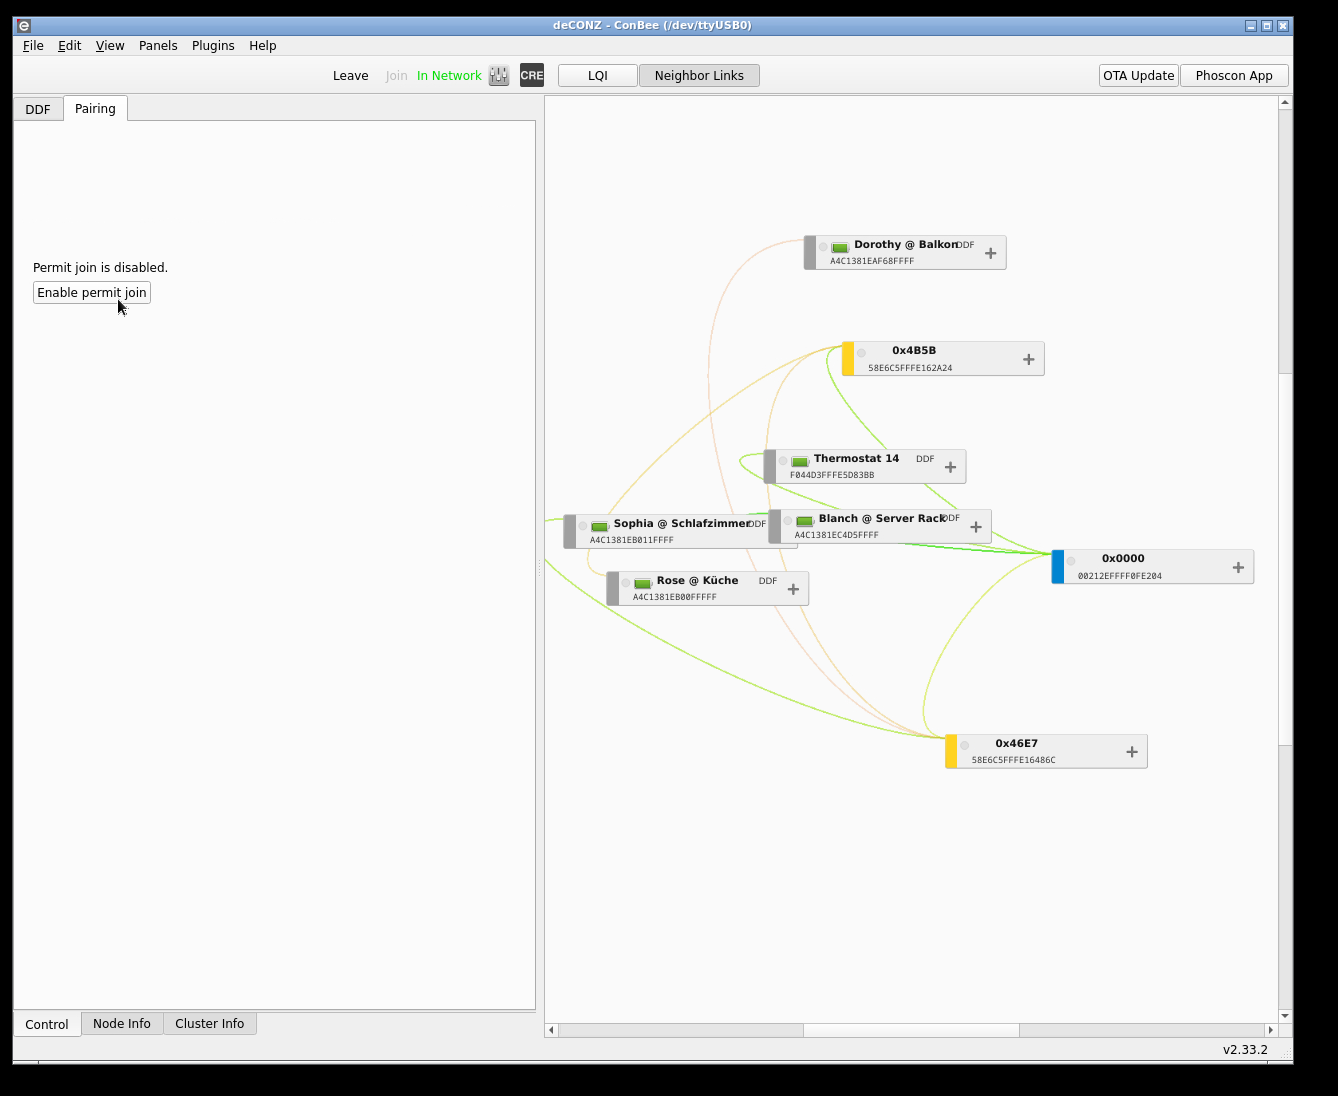
To connect the sensors to your Zigbee network, make sure to remove the piece of paper in front of the battery contact and then, in deCONZ, open the “Control” tab, then the “Pairing” tab and click on “Permit Join”. Within a few seconds, the new sensor should appear in deCONZ.
As of October 2026 (v2.33.2), the exact temperature sensors that I bought were not yet fully supported by deCONZ. Fear not though, Dresden Elektronik has great customer support both on their forums and on GitHub. With their help it only took half an hour to figure out a solution.
If your sensor is of the same type (SNZB-02B) and you’re on the same deCONZ version as I am, you will have to provide a custom DDF file. That’s a JSON file that tells deCONZ how to map certain Zigbee stuff to its own internal stuff.
You can find more information in the GitHub issue for this sensor type. It also contains the exact JSON file that you will need to supply to deCONZ. Download it from GitHub and then
- place it into
./data/devices/snzb-02_multisensor.json - restart deCONZ:
docker compose restart - Important: You must remove the batteries from the sensors briefly to make this work. You would think that “I’m only changing the coordinator’s understanding of the network traffic”, but no, for some reason it is not enough to just press the button on the Sonoff sensors to make deCONZ understand them. You absolutely have to remove the batteries.
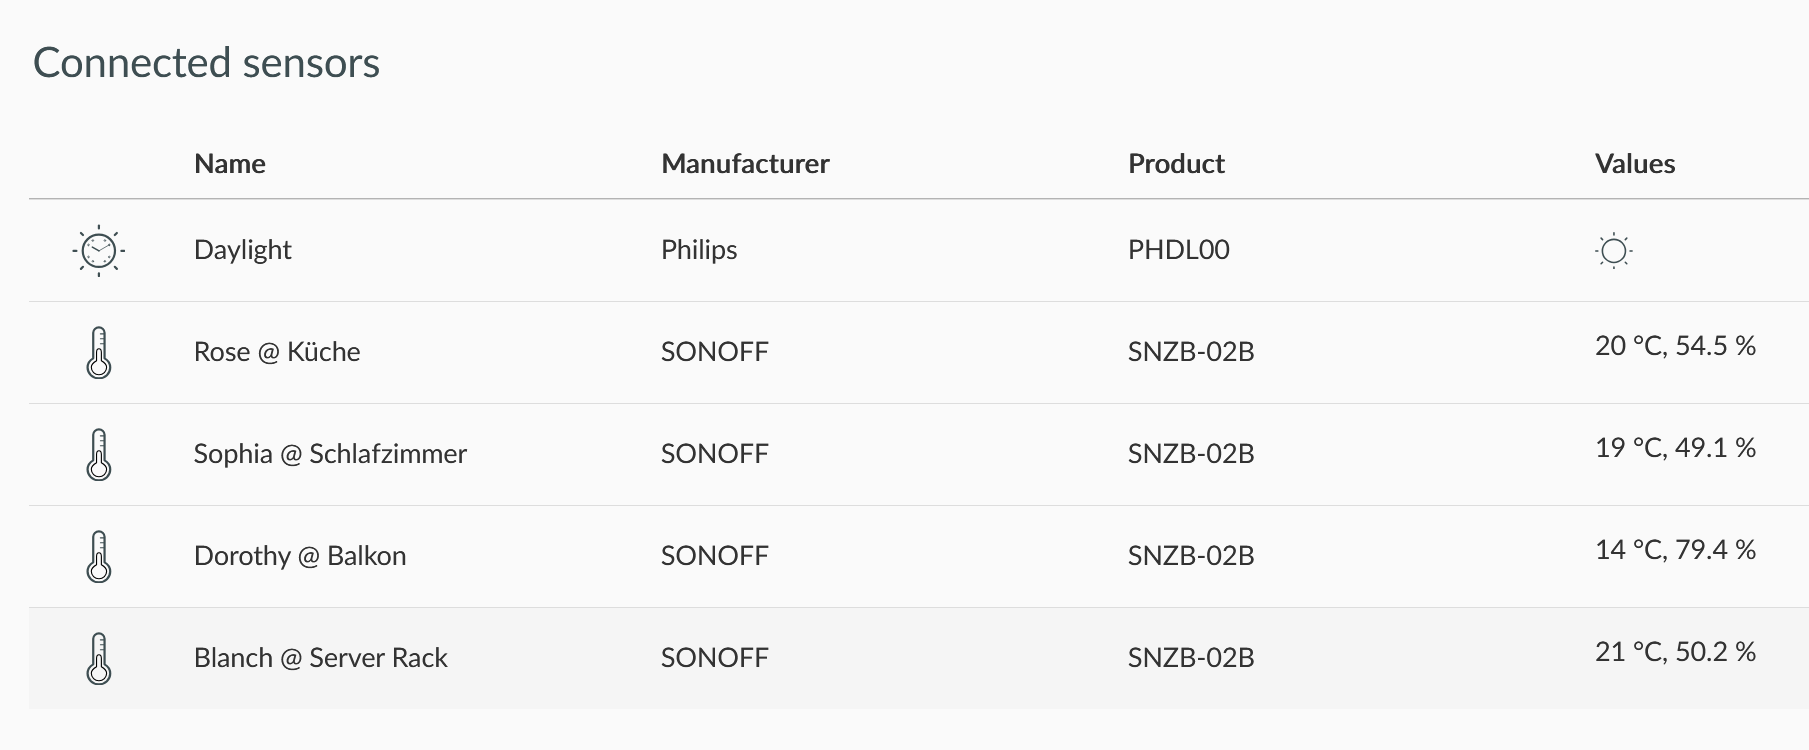
After this little detour, your new sensors should appear as temperature sensors in deCONZ. From now on, if you open the Phoscon web app, you can also see the sensors on there.
Grabbing the Data
Ultimately I needed to get the measurement data from the sensors into my own monitoring tooling. Thankfully deCONZ offers two very simple options for that: either use their REST API or the websocket. I chose the REST API for simplicity.
Check the official documentation
on getting started, set up your API key and then you can just curl http://<pi>:81/api/<key>/sensors
to get the latest data from each sensor in one big JSON response, like this one:
{
  ...,

  "12": {
    "capabilities": {
      "sleeper": true
    },
    "config": {
      "battery": 100,
      "offset": 0,
      "on": true,
      "reachable": true
    },
    "ep": 1,
    "etag": "8f7b08d921919b438bedbb708ffe674e",
    "lastannounced": null,
    "lastseen": "2026-10-03T15:24Z",
    "manufacturername": "Sonoff",
    "modelid": "SNZB-02B",
    "name": "Küche (Rose)",
    "nwkaddress": "0x1FC9",
    "state": {
      "lastupdated": "2026-10-03T15:24:15.347",
      "temperature": 2140
    },
    "swversion": "20260516",
    "type": "ZHATemperature",
    "uniqueid": "a4:c1:38:1e:b0:0f:ff:ff-01-0402"
  },

  ...
}
Do with the data whatever you want. Take note that each Zigbee device can provide the
same cluster (like ZHATemperature) multiple times. The Sonoff sensors I bought don’t,
but it’s technically possible (in this case, you would have multiple endpoints,
identified by the ep field in the response).
The Sonoff sensors each provide 1x ZHATemperature and 1x ZHAHumidity cluster.
These are independent of each other, so if the temperature changes rapidly, you might
get a bunch of temperature updates, but no humidity update. If nothing changes, each
will be transmitted every 10 minutes, but still independently. Make sure your client
software can handle this correctly.
Adding a Thermostat
Coincidentally I suddenly had the need for a thermostat on one of my radiators, which thankfully is relatively simple to do with my Zigbee network. To keep things simple, I bought the Sonoff TRVZB thermostat. It was easy to set up, but by default only works in “local mode”, where the temperature sensor used is the one built into the thermostat. For my usecase that does not make sense and I wanted to use one of my other sensors as the temperature source for the thermostat. This is an officially supported feature of the Sonoff devices.
To get this to work, you will need to first reconfigure the thermostat to rely on external temperature values. You can do this in the deCONZ software.
- Find your thermostat in deCONZ.
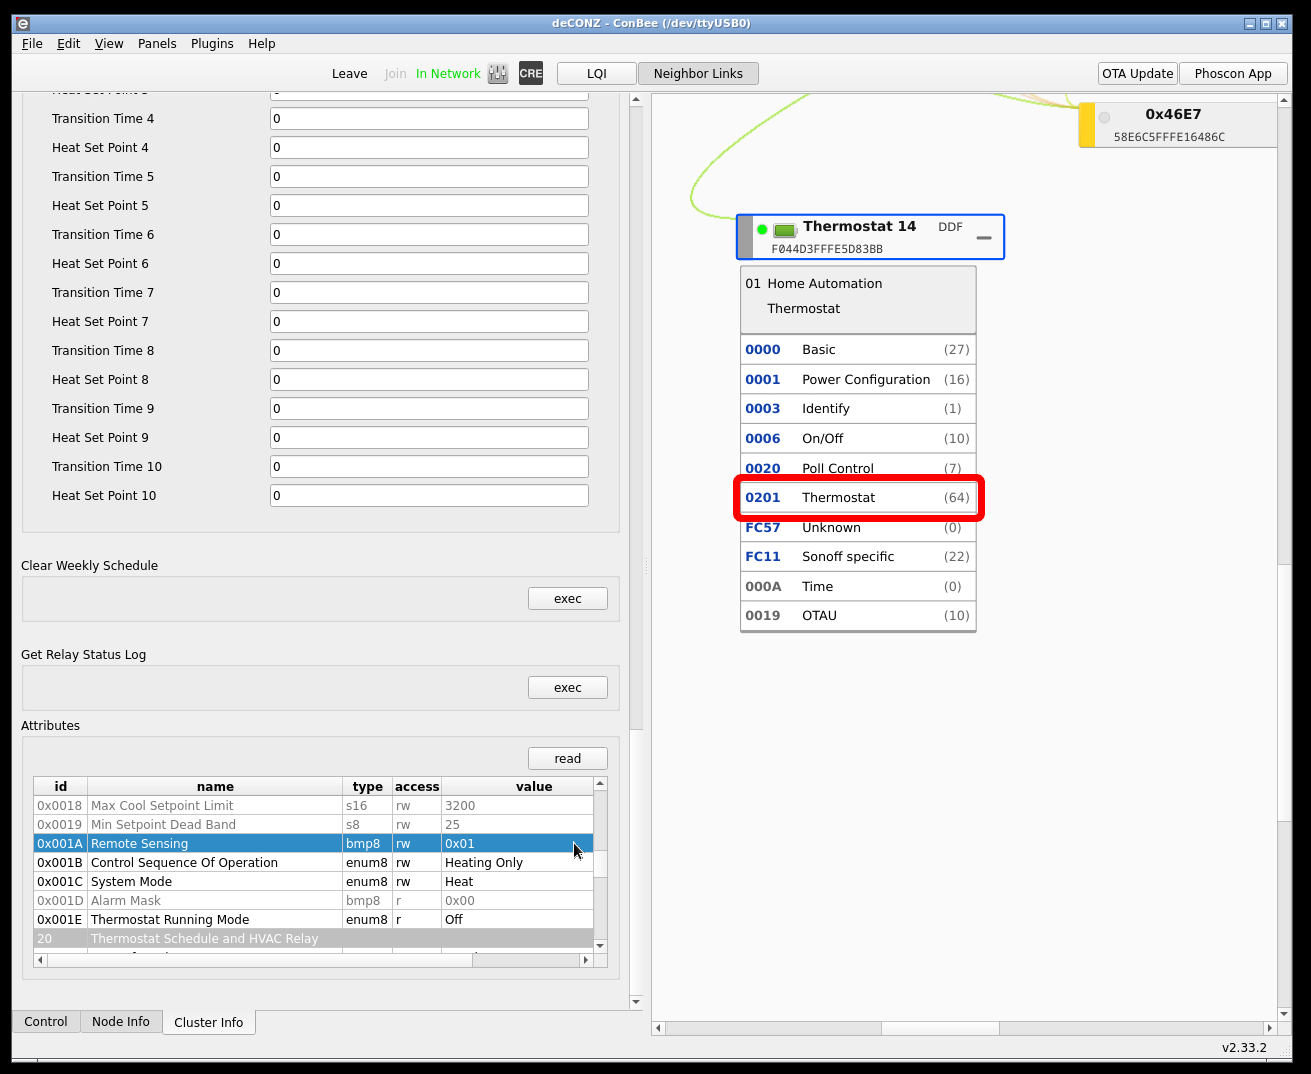
- Open the “Thermostat” Cluster and scroll down to the attributes.
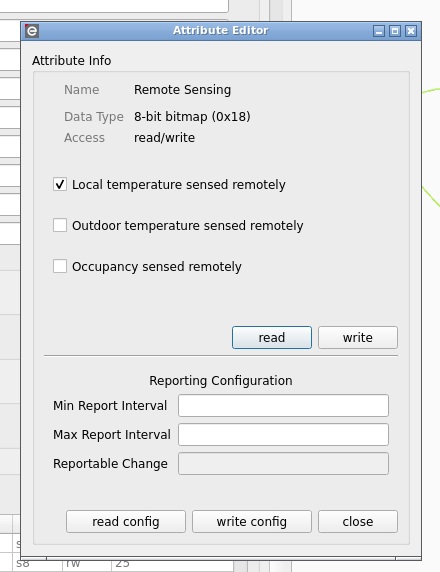
- Find the “Remote Sensing” Attribute (ID
0x001A). Double click it to open the UI and tick the checkbox “Local temperature sensed remotely”. Then write this to the sensor.
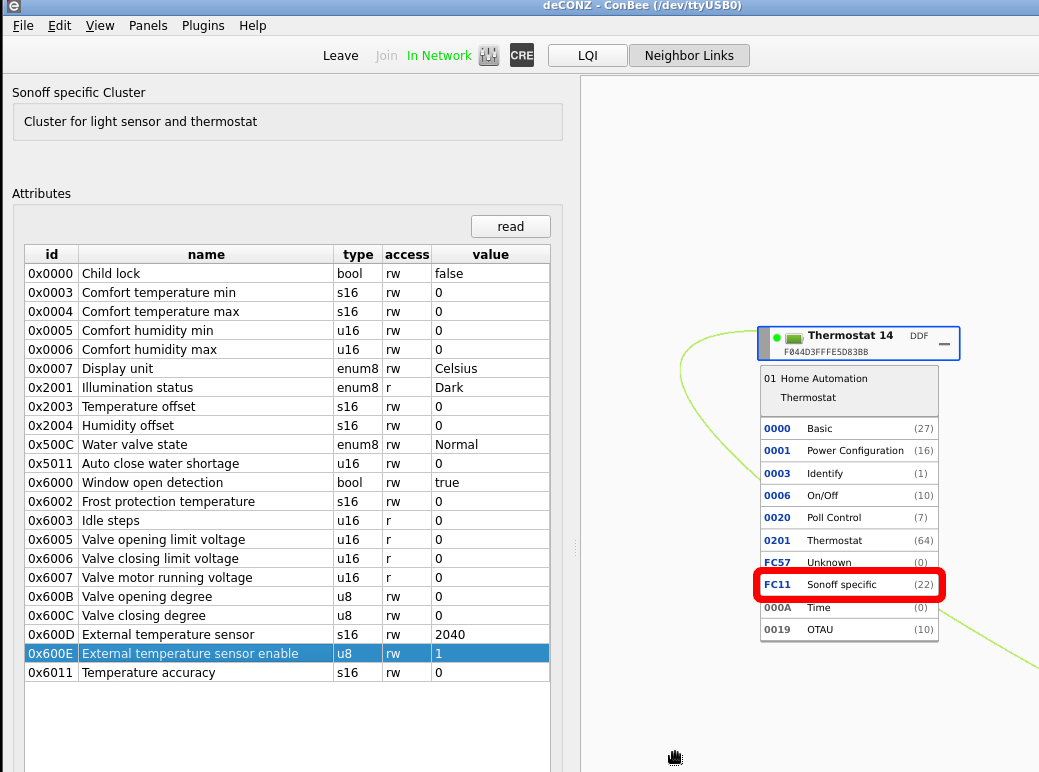
- Open the “Sonoff specific” Cluster.
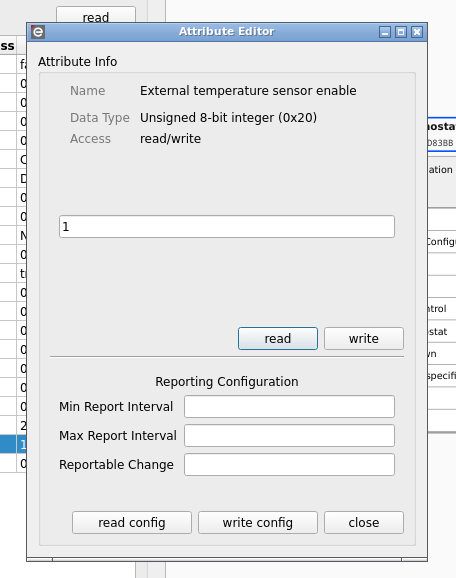
- Edit attribute “External temperature sensor enable” (
0x600E). Set its value to1.
This concludes the setup. From now on, the thermostat will not read its own internal temperature sensor anymore, but rely entirely on someone else to regularly update the external temperature value. This someone has to be us, as far as I know, deCONZ cannot do this automatically (other tools like Home Assistant can, though).
What I do is, roughly speaking, every 5 minutes read the temperature from the sensor in the
kitchen and then send it to the thermostat. To do this, find the thermostat deconz ID (that is
the top-level key in the API response for /sensors, for me it’s 14) and then send a JSON
payload like so to the deCONZ gateway:
$ curl "http://<pi>:81/api/<key>/sensors/14/config" -XPUT -d '{"externalsensortemp":1950}'
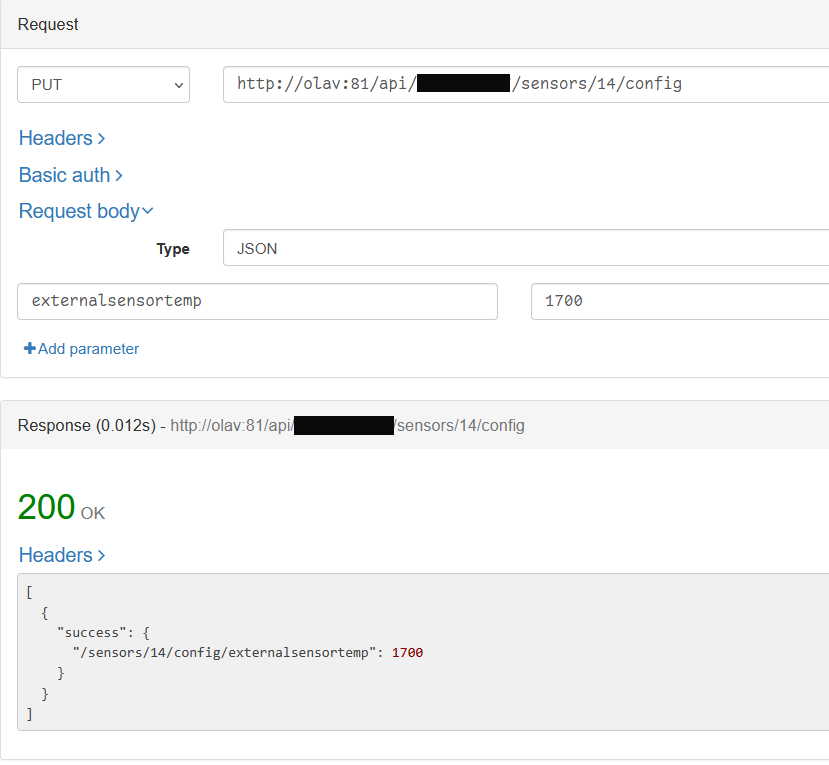
The temperature, as usual, has been multiplied by 100, so 19,5°C becomes 1950. You can set
the Set Temperature (the desired one) either by turning the knob on the thermostat or by using
the Phoscon web app, or via the REST API, too, but I never checked which value exactly to send.
Routers
Zigbee reception for me wasn’t super great. Since I had already bought a few ESP32-C6 modules, I decided to flash those with a generic Zigbee router firmware and use them just to extend my network a bit.
This works, however the transmission performance of the ESP modules was not the best, far worse than what the ConBee III stick already does. I had the expensive SeeedStudio ESP modules, so I do not think it’s a problem of a cheap knockoff.
If you decide to go this route, be prepared that it will take many hours for the network to incorporate topology changes. Ideally, as with changing the DDF, you remove the batteries from your sensors to speed up the discovery process. Still, for me it took three days until I could see a mesh-like topology in deCONZ.
Outlook
This is already everything you need. You now have sensors, a thermostat and a working Zigbee network. Enjoy! :)
Due to my starting issues with the missing DDF and also weak transmission, I am very glad I chose to buy the ConBee III stick. Not having it would have turned setting this all up into an undebuggable nightmare.
I still plan on building additional sensors myself, like my multiscale that can weigh 4 things at the same time but is still using WiFi. That would be one device that has 4 endpoints, each sending one generic measurement (at least AI assured me there was such a generic cluster in ZHA).
And yes, my 4 temperature sensors are named after the Golden Girls.